Pressure In Wet Felting – Part 2
Apr 19, 2017RUBBING/MASSAGING/KNEADING
1. WITH YOUR HANDS
This is probably the most intuitive method because all you need for it are your bare hands.
It’s definitely the one to use after you’ve laid the wool, and applied water and soap. You start by pressing the wool layers to get the air out of the fibers, and then you rub and massage gently, to get the fibers to migrate and slowly connect to each other.
It’s generally a good idea not to work directly on the wool in this phase, to avoid the fibers from moving. Instead, you should lay a piece of tulle, net or a plastic on the wool, to keep the fibers in place.
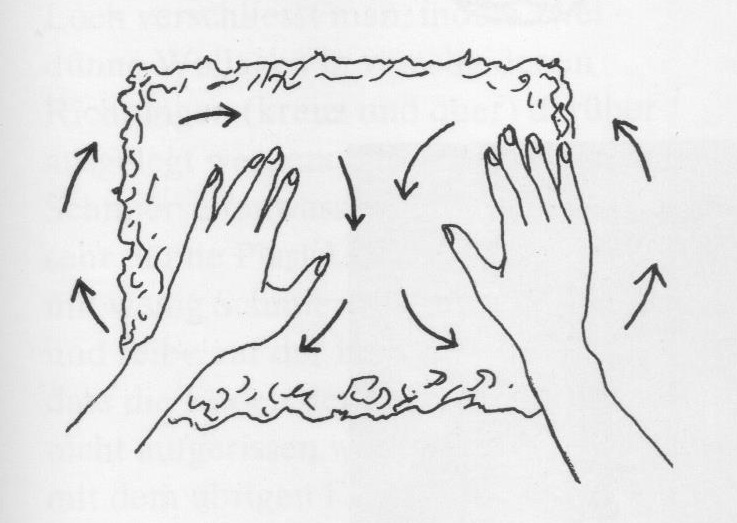
Image from “Filzen – Alte Tradition, modernes Handwerk”, Gunilla Paetau Sjöberg
If you’re working on a small piece it probably doesn’t make much sense to use the rolling method, so you might do the entire piece using only your hands. In this case, just rubbing and massaging might still take too long, so a great alternative is to knead, just like when you’re kneading bread dough.
I love this method because I really enjoy the direct contact with the fiber. If you find it’s taking you too long, try kneading while alternating the piece in hot and cold water. This shocking technique makes the fibers compact quicker.
But if the item you’re working on is a bigger one, this method alone might take you ages, so after using it in this first phase, I do recommend changing to a more effective one.
2. USING TOOLS
Washboards in different shapes and sizes are great tools for wet felting. You can find a big variety on the market, and they are usually made of wood, but you can also find cheaper versions in plastic.

Image from “Filzen – Alte Tradition, modernes Handwerk”, Gunilla Paetau Sjöberg

Image from “Filzen – Alte Tradition, modernes Handwerk”, Gunilla Paetau Sjöberg
They are very easy to use. You just have to place the felt item on the surface and rub, or, when working with the smaller versions, rub them on the spots you want to full.
The advantage of this method is that you can achieve shrinkage quickly and in a targeted way, so it’s ideal to work on small areas. An example of when to use this technique is when you’re shaping a hat, as in the images below.
But the disadvantage is that it’s hard to get a uniform shrinkage for big surfaces, because the pressure is not even. So, I really recommend using this technique only for targeted small areas.

Image from “Vom Filz behütet”, Bruno Bujack

Image from “Vom Filz behütet”, Bruno Bujack

Image from “Vom Filz behütet”, Bruno Bujack
Make sure you stop by next week, because I’ll go into further details on techniques to add PRESSURE to your wet felting project.
See you then!
Get fresh tips, video instructions, news about class registrations, as well as exclusive early bird offers directly into your inbox.
