The Dodo Blog
You’re an artist too. So, I’m sure you can relate.
We grow, learn new techniques and slowly discover new possibilities as our craft develops. As we lean into the next chapter, some of our earlier work naturally becomes part of an earlier stage of our journey.
For me, that also means creating ...
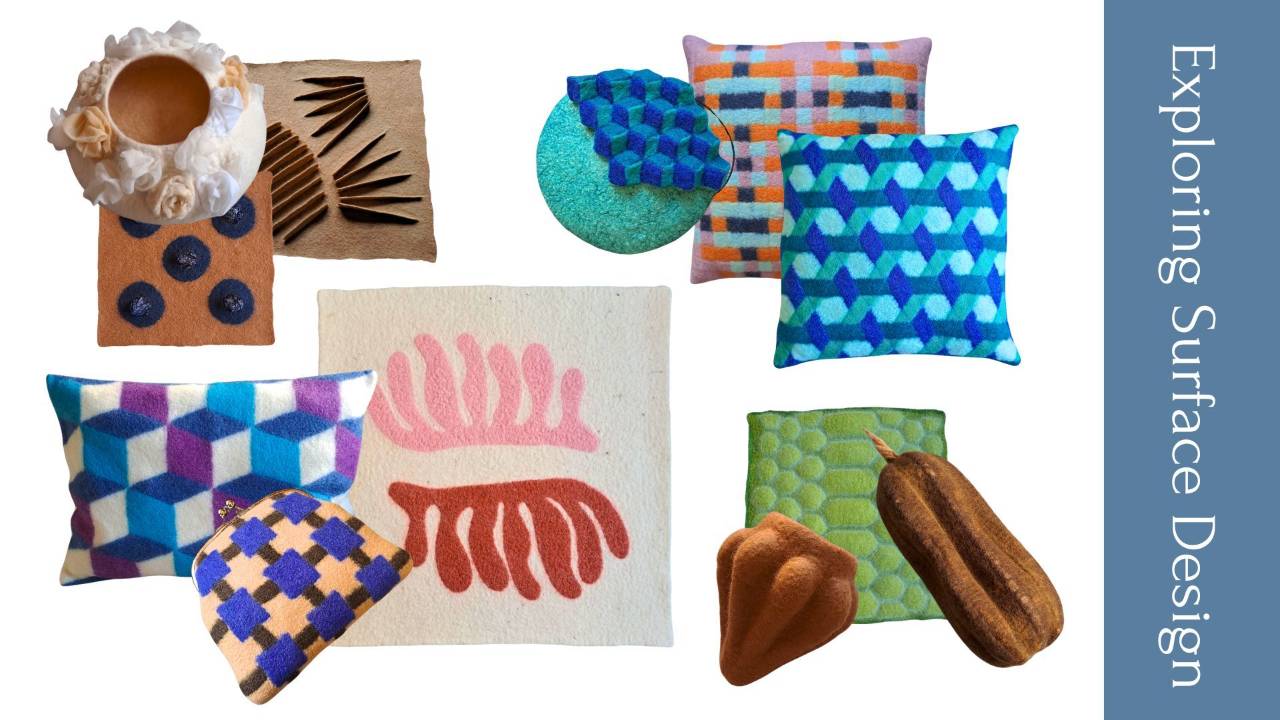
My new online program, Exploring Surface Design, is now open for registration until April 6th.
This program grew out of the evolution of The Dodo Hub into three shorter, more focused trainings. And this one is dedicated entirely to surface design.
If you’ve ever felt that your surfaces could be mo...
I’ve spent years felting berets and trying to get them to be soft and wearable. Along the way, I tested materials, methods, and fiber ratios until I found what I was looking for.
The course FELTING SOFT HATS – THE BERET distills those experiments, based on trial and error, into a clear, practical ...
If you’ve ever wet felted a beret, you might relate to this frustration: no matter how thinly you lay out your wool, the result turns out too stiff; even with fine merino, the beret never really drapes the way you want.
I know, because I went through the same thing for years.
That got me into a lo...

About two years ago, I taught a class called RESISTS MADE EASY – A PROVEN SYSTEM TO DESIGN RESISTS FOR WET FELTING.
It covered how to make resists for shoes, clothes, hats, bags, gloves and vessels in all sorts of shapes.
It was well received and fun to teach. But, next, I started focusing more on...
This is a question I know you’re asking yourself: Is the Baby Special Edition worth it?
That’s, of course, something only you can decide. But skimming through the class description will only give you a general idea. So, I’ve made a video to show you exactly what’s inside the “baby package”.
It’s ...
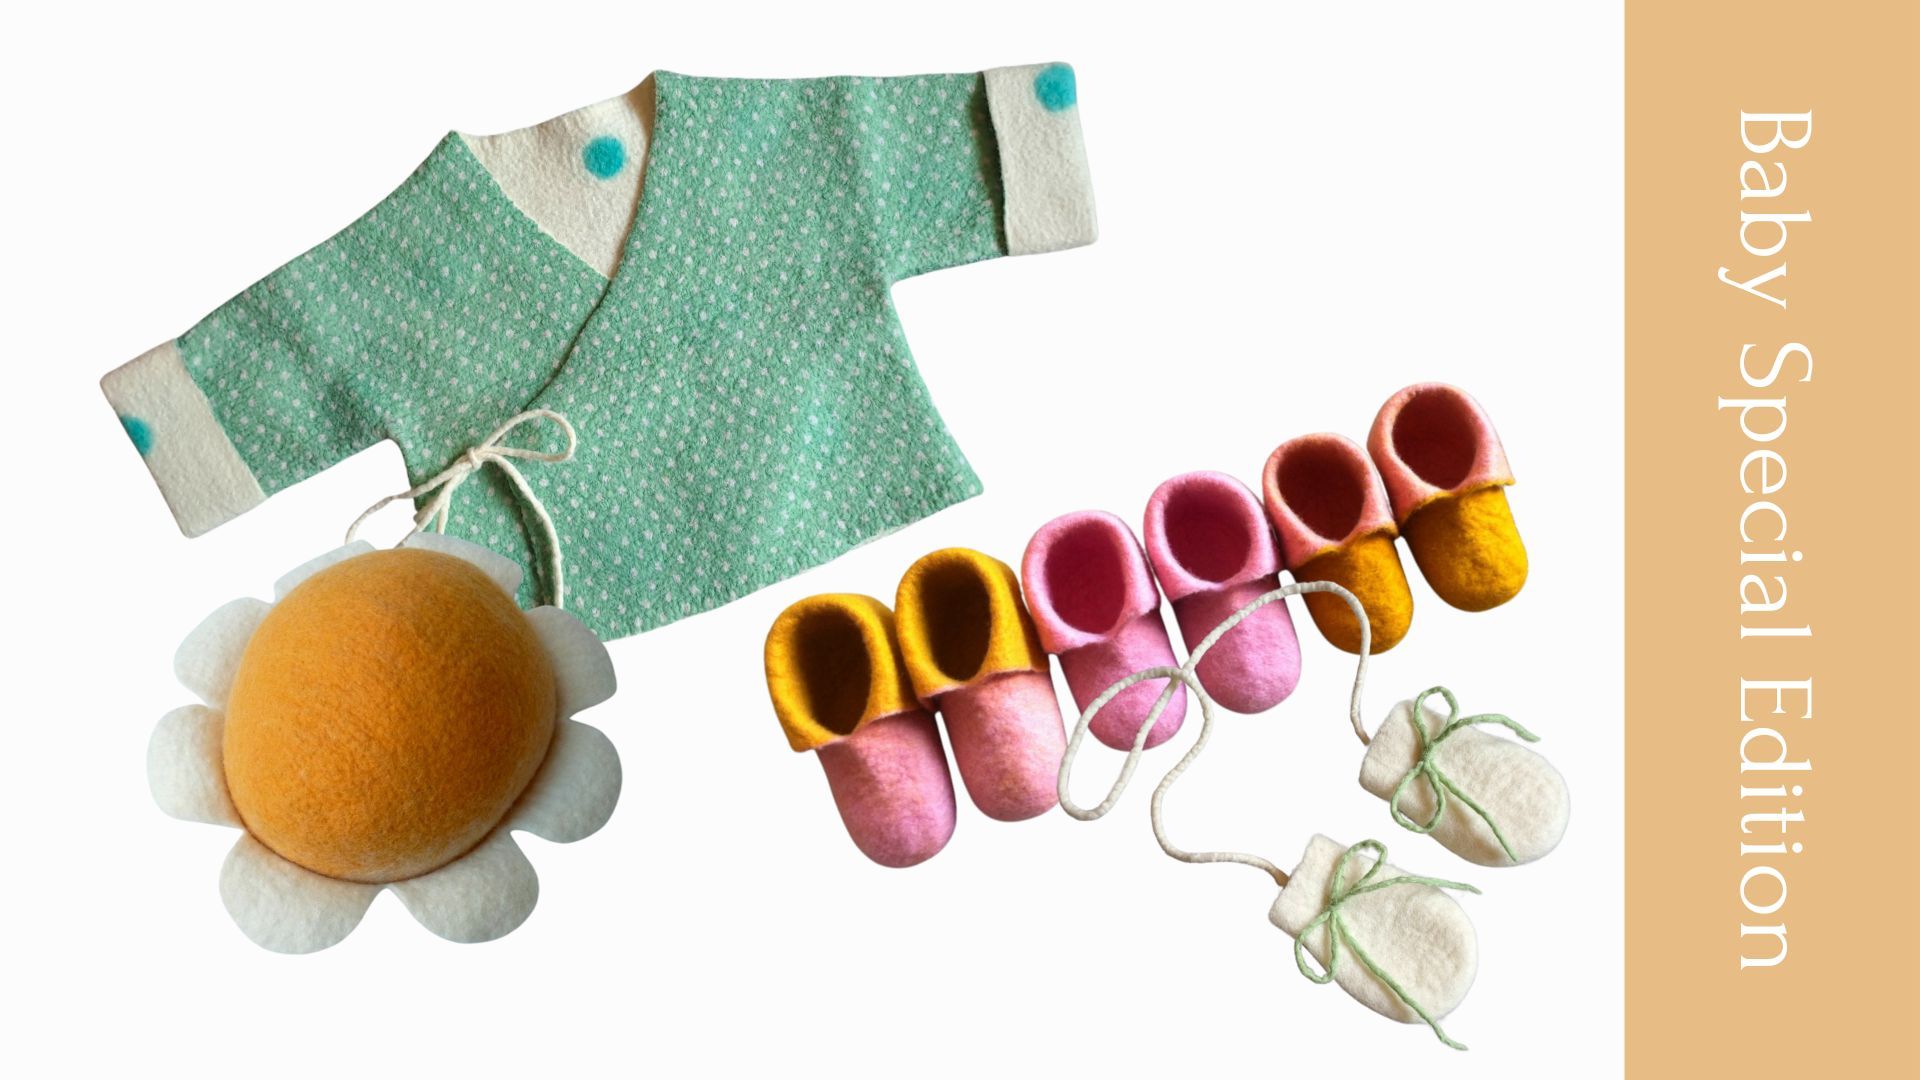
Today I’m bringing you something special, the Baby Special Edition.
Usually, you can only get these classes separately.
Now, for a limited time, I’m combining the Sweet Baby Jacket & Daisy Baby Hat with the Comfy Baby Booties & Tiny Baby Mittens in one package. In other words, you get 2 for the pr...

Have you noticed the BABY classes are back?
Many of you have been asking to have the baby booties class separately. You’ve also showed interest in having it available “on demand”, which is understandable, since babies grow fast 😊
So, I’ve listened to your requests and created two separate classes:...
If you’ve been in my felting world for some time, you’ve heard me talking about this book for sure. It’s one of my absolute favorites in my collection.
If you’ve just recently discovered my blog, and you’re as obsessed about felting books as I am, there’s still time to add it to your Christmas pres...
"Filzen: Alte Tradition, Modernes Handwerk" (German version)
"Felt: New Directions for an Ancient Craft" (English version)
by Gunilla Paetau Sjöberg
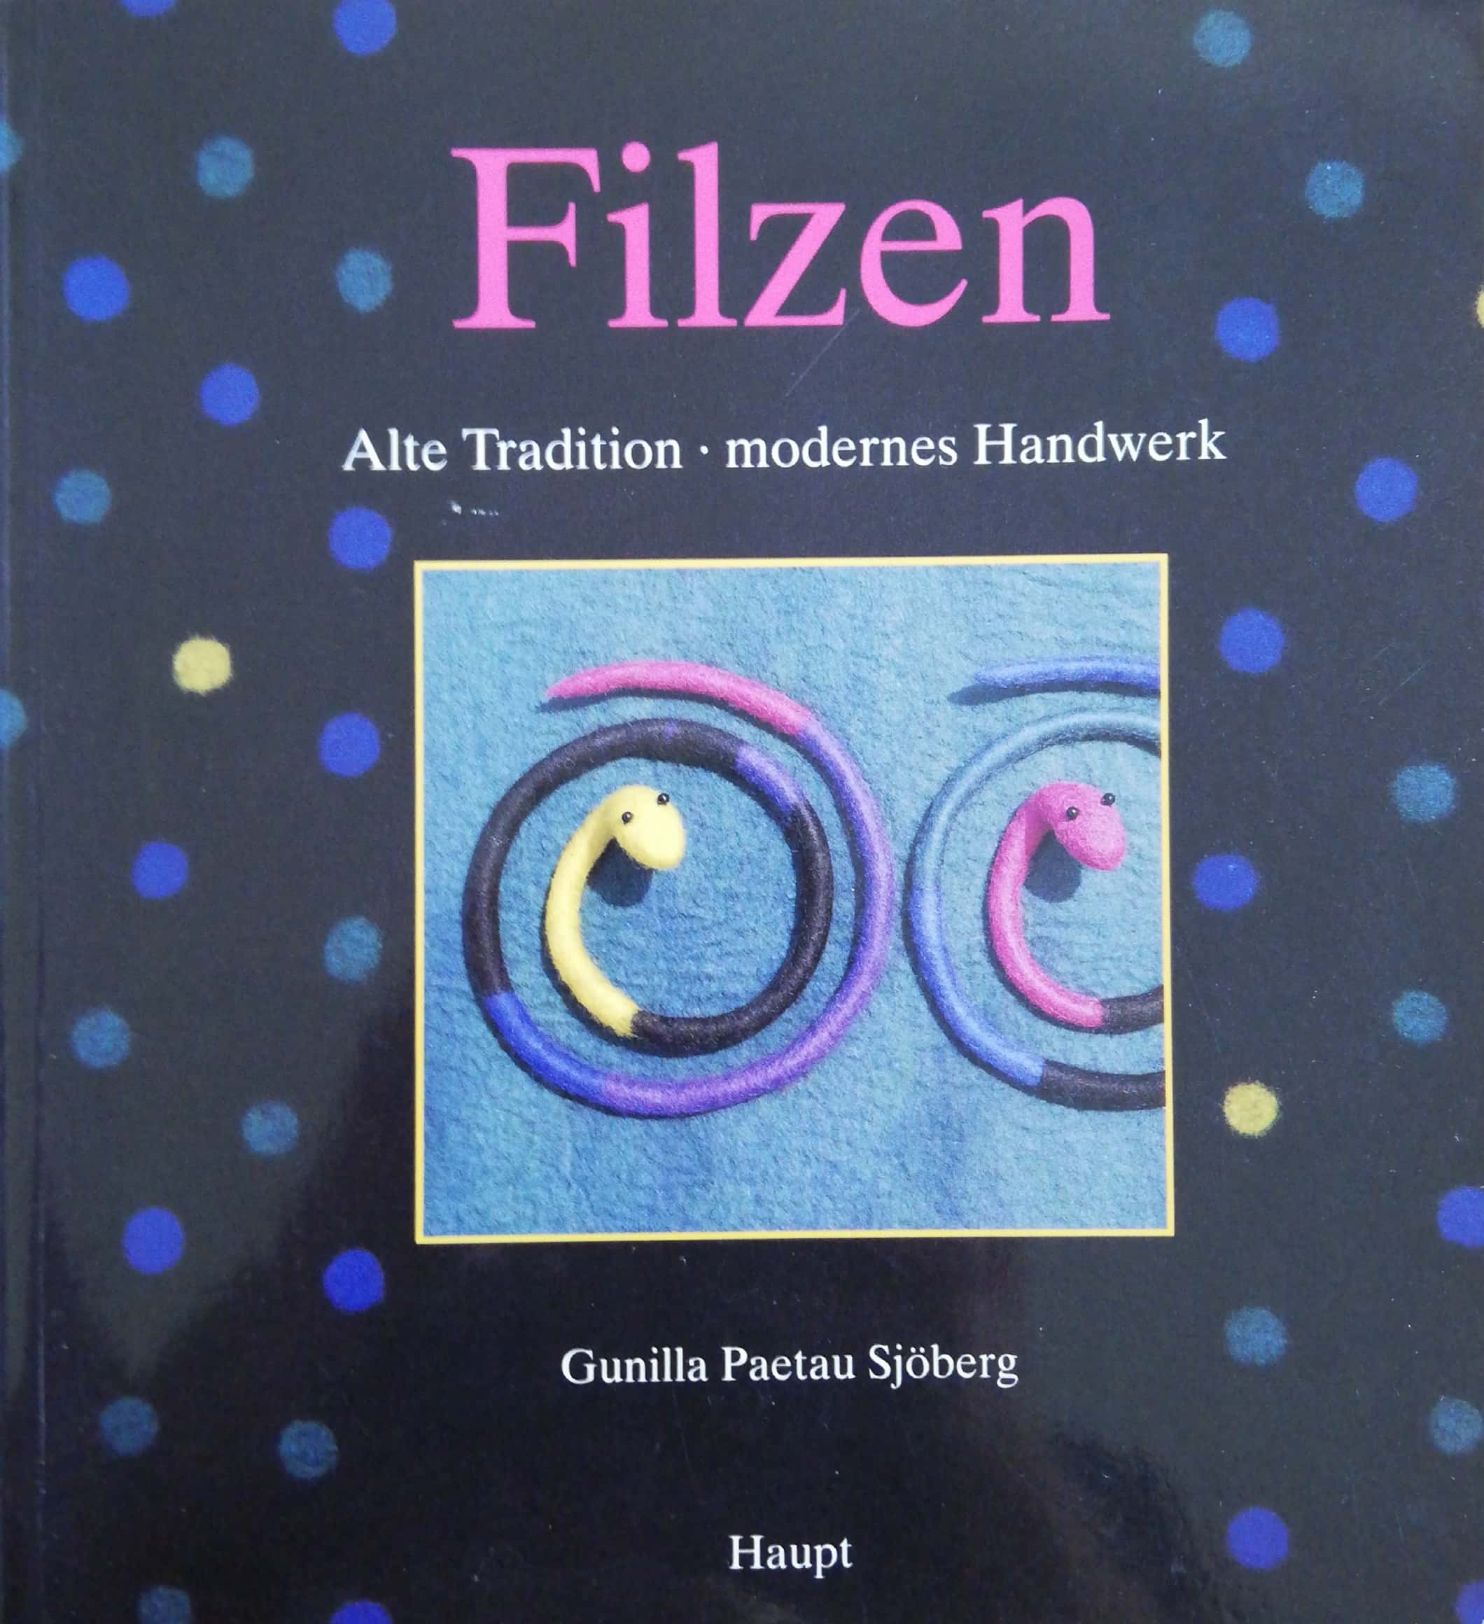
This might be the best book about wet felting I have. And I do have many 😊
It’s over 20 years old, it doesn’t have amazing photos and it has a l...

Just wanted to let you know you can enroll for the Wet Felted Hats Masterclass from May 15th to May 19th.
The course will start May 22nd and will have a duration of 8 weeks.
If you've been wanting to improve your hat felting skills, stay tuned for the details tomorrow :)
Talk soon!
Vanda
As you might know, I created a new course recently: the Wet Felted Hats Masterclass for all of you who’d like to refine your hat making skills.
There was a first edition in February/March, which I launched as a test course. I had built a base structure and invited people to join as Founding Members...
